Here are some of the projects we worked on during COVID.
Hearts and Flowers

Sally based her applique flower blocks on this beautiful quilt

Here is one of the hearts quilted block

The quilted blocks were based on this book by Aie Rossmann; available from Amazon

The applique blocks were based on this book: Rose Sampler Supreme by Rosemary Makhan.
Michele and Sally showed us how to make the ‘Hearts and Flowers’ quilt, which involved making 16 quilt-as-you-go blocks using applique and hand quilting. Videos explaining the techniques can be seen below.
For a list of materials press here.
Michele - Quilted Hearts
Sally - Applique
Hand Quilting Basics
Easy Way to Applique
Work in progress from the team!

Heather’s March applique

Rose’s March applique

Deborah’s March applique

Heather’s March quilting

Rose’s April applique

Rita

June’s March applique

Deborah’s April applique

Rose
Mimram Temperature Quilt Challenge
What is a temperature quilt?
The idea of a temperature quilt is to make a 365 (366 for leap years) block quilt where each block has the low and high temperature for a day represented, using a colour for each temperature (or range of temperatures, because having a unique colour for every temperature would be close to impossible). Alternatively, you can make the blocks using the average temperature for the day.
If you Google ‘temperature quilts’ or search for ‘temperature quilts’ on Pinterest or Instagram you will find some fantastic examples of quilts and different interpretations of the idea. The possibilities are endless.


What is the challenge?
Make a temperature quilt for the year of your choice. It could be a year with some significance for you.
Getting started:
Find the temperature data using websites such as www.wunderground.com (select location, calendar, month and year, view) or www.weathertab.com .
Choose colours to match your temperature ranges. It is best not to have fewer than 12 colours so that you can get enough definition into your pattern. Some designs use 24 colours or more! The norm is to use cool colours (purple, blue and green) for the cooler temperatures and warm colours (yellow, orange, red) for the warmer temperatures, but you can do whatever pleases you. What is important is that you have a variety of either colour OR value (light, medium, dark) or both.
Plan your design and get cutting and sewing!
Some tips about getting started:
You can search for the data you want on www.wunderground.com and then put the maximum and minimum temperatures for each day of your chosen year onto a spread sheet. This will be useful for making your blocks; you can then tick them off one by one. At least, that’s the plan!
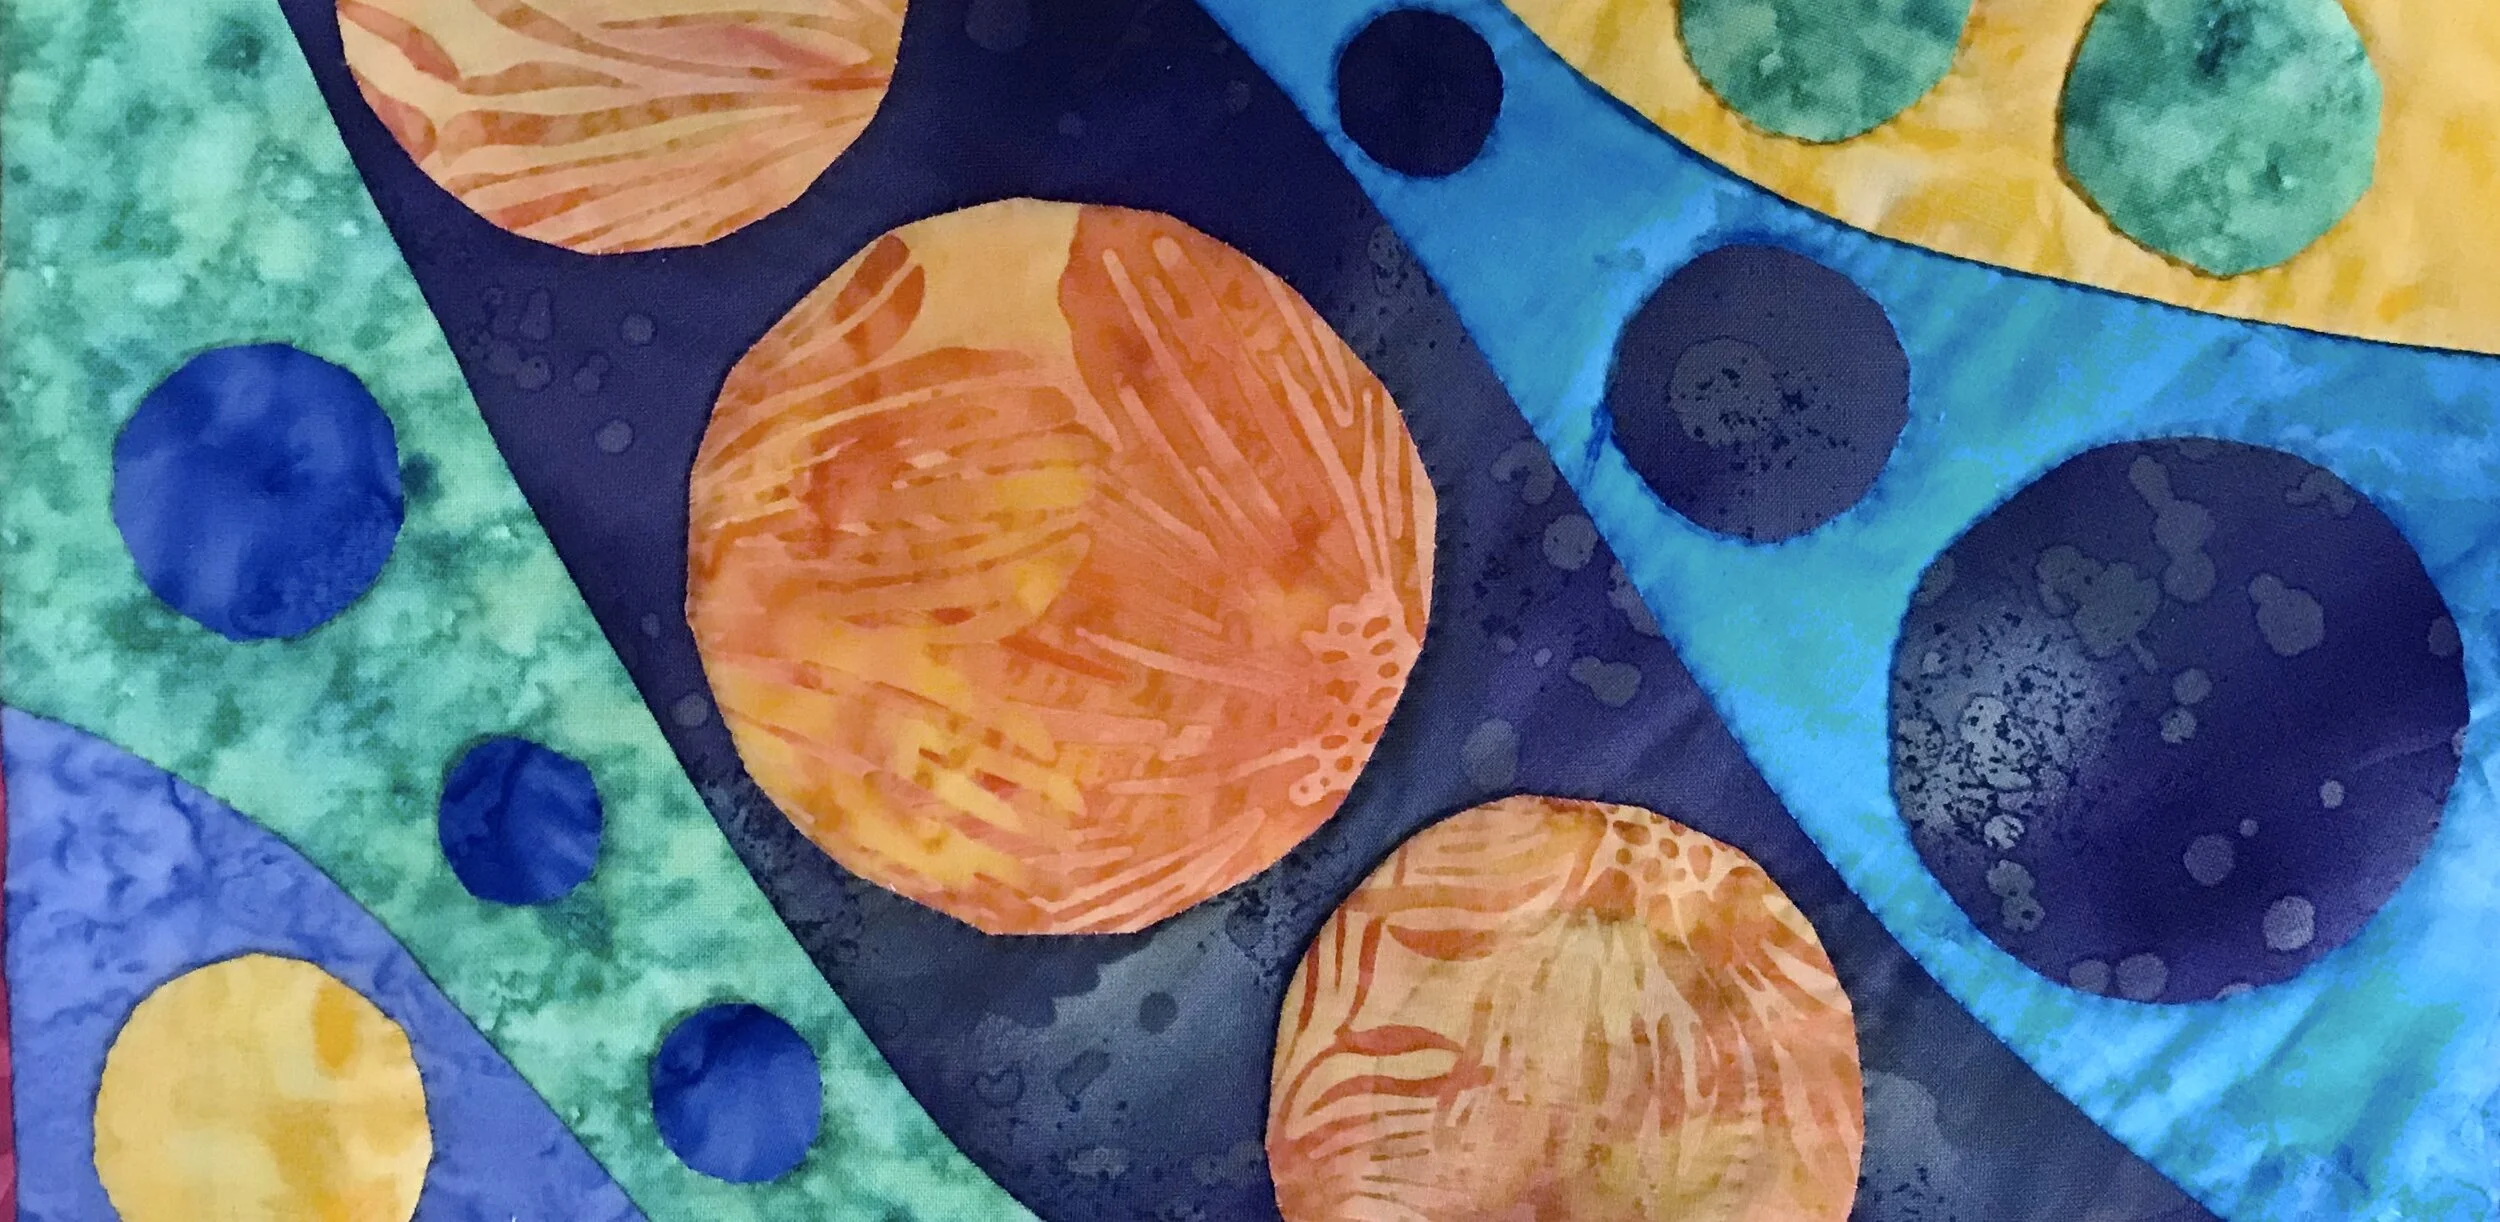
A tally of all the different temperatures made an elegant distribution curve!
The temperatures ranged from -5 degrees Celsius to 37 degrees Celsius so it was decided to assign each two degree difference a different colour.
You can use Kona cotton solids chart to select your colours.

Colour choices for temperature quilt

Jo’s completed temperature quilt.

Temperature blocks for 1st to 12th January 2019

Kathy’s completed temperature quilt. Data for St Albans 2019

… and a label to show the temperatures.

Cindy Grisdela Art Quilts

Cinzia Allocca

Heather Kojaen inspired by Faith's at Fresh Lemons
Mimram Modern Sampler BOM.
If you want a bit of support and a push to make a modern quilt, then this is the project for you! This is not a group with a definite quilt at the end of it, you will end up with a quilt that you want, the size you want and the colours that you want. You could end up with a 2-colour quilt, or a multi coloured quilt.
You can use as many or as few of the blocks as you want, the sizes of each block can be anything that you like. You could make each block the same size or all different sizes.
Each month Sarah sent members a web link to instructions for a modern quilt block, Sarah’s aim is to have a challenge that was very flexible, and where the end results would all be very different.
Some tips from Sarah about getting started:
You can use your scraps or any fabric that you want. Most modern quilts use bright colours with high contrast but I would recommend trying each block with scrap fabrics so you can see if you enjoy it.
Most blocks end up having to be squared up, so a square ruler will make life easier but is not essential.
Unlike in traditional quilting you don't have a finished design to work to so a plain space that you can move blocks around on will be helpful, for example a brushed cotton cot sheet or use anything that you have.
Use the camera on your phone or tablet to help with design decisions.
Block 1: Garden in the Rain

Garden in the Rain. Helen Howes

Garden in the Rain variations. Helen Howes
This is a very simple block called Garden in the Rain. (Click on the text in blue for the instructions.) Although this is a simple block, there are ideas in the instructions as to how you can make it more interesting or more complicated. You could make more than one inset strip or piece your inset strip. Make as many or as few as you like, the instructions show a whole quilt made from the block and its variants.
Sarah’s hints:
the steeper the angle you cut at, the more you will need to trim your block to shape.
in order to keep your block roughly square, your inset strips need to be 1" wide. If you want to alter the width of the inset strip then be aware that it will alter the size of your block.
bias edges can be a pain! Try starching the block to (hopefully) make it easier.
Block 2: Straight Crosses

Straight Cross: Heather

Straight Cross: Heather
These Straight Cross blocks start in the same way as the previous Garden in the Rain blocks but you then turn the block through 90 degrees and repeat the cutting and inserting.
Sarah’s hint:
When you are lining up to sew the second insert strip you have 2 choices - if you line up the edges of the block then the cross may not line up perfectly, or you may prefer the arms of the cross to be slightly off. See which you prefer!
Block 3: Tiger Tiger

Tiger Tiger by Helen.

Tiger Tiger by Beryl for Linus Quilts.
This block is called Tiger Tiger.
Sarah’s hints:
Fabrics with a right and wrong side make life easier.
Keep your curves shallow, steep curves end up altering the size of the block so you will need to trim them more.
Sometimes the fabric starts to slip as you cut it. You can pin the fabrics together and even use scissors to cut the curves if you find it easier.
You can make this block with a different number of stripes by altering the size of the original piece of fabric just remember that each curved cut will end up making the final block 1/2" shorter.
This is a really useful technique for sewing gentle curves and is in fact used in many other blocks such as in Modern Crosses http://mqgb.org.uk/tutorboxes/tbox9.html.
If you want to try slightly different versions of this block then have a look at
https://www.yoansewingstudio.com/quilting/scrappy-improv-quilt-free-piecing-gentle-curves.
Or
https://thelastpiece.typepad.com/the_last_piece/2009/03/curvy-class.html.
Block 4: Marbles

Pattern developed by Heather Hasthorpe
The theme of these blocks is Curves!
Sarah’s Hints:
Don't expect to make these the same as Drunkard path blocks! The edges of the 2 pieces should not be level.
Starting your curve at a right angle to one of the edges makes it easier to sew.
It's amazing how close to a quarter circle you can cut when you're not trying!
These can also be made into rings as shown on https://www.mybluprint.com/article/curved-quilt-blocks
If you don't enjoy this technique but still want to have some curves then you have several different options:
Machine applique wonky curved pieces.
Hand applique circles or ovals, these could be made from pieced blocks to give more interest.
https://artwithaneedle.blogspot.com/2010/03/quilt-date-for-march.html shows how to do curves simply using templates that you make yourself, but is actually really easy!
Block 5: Triangles
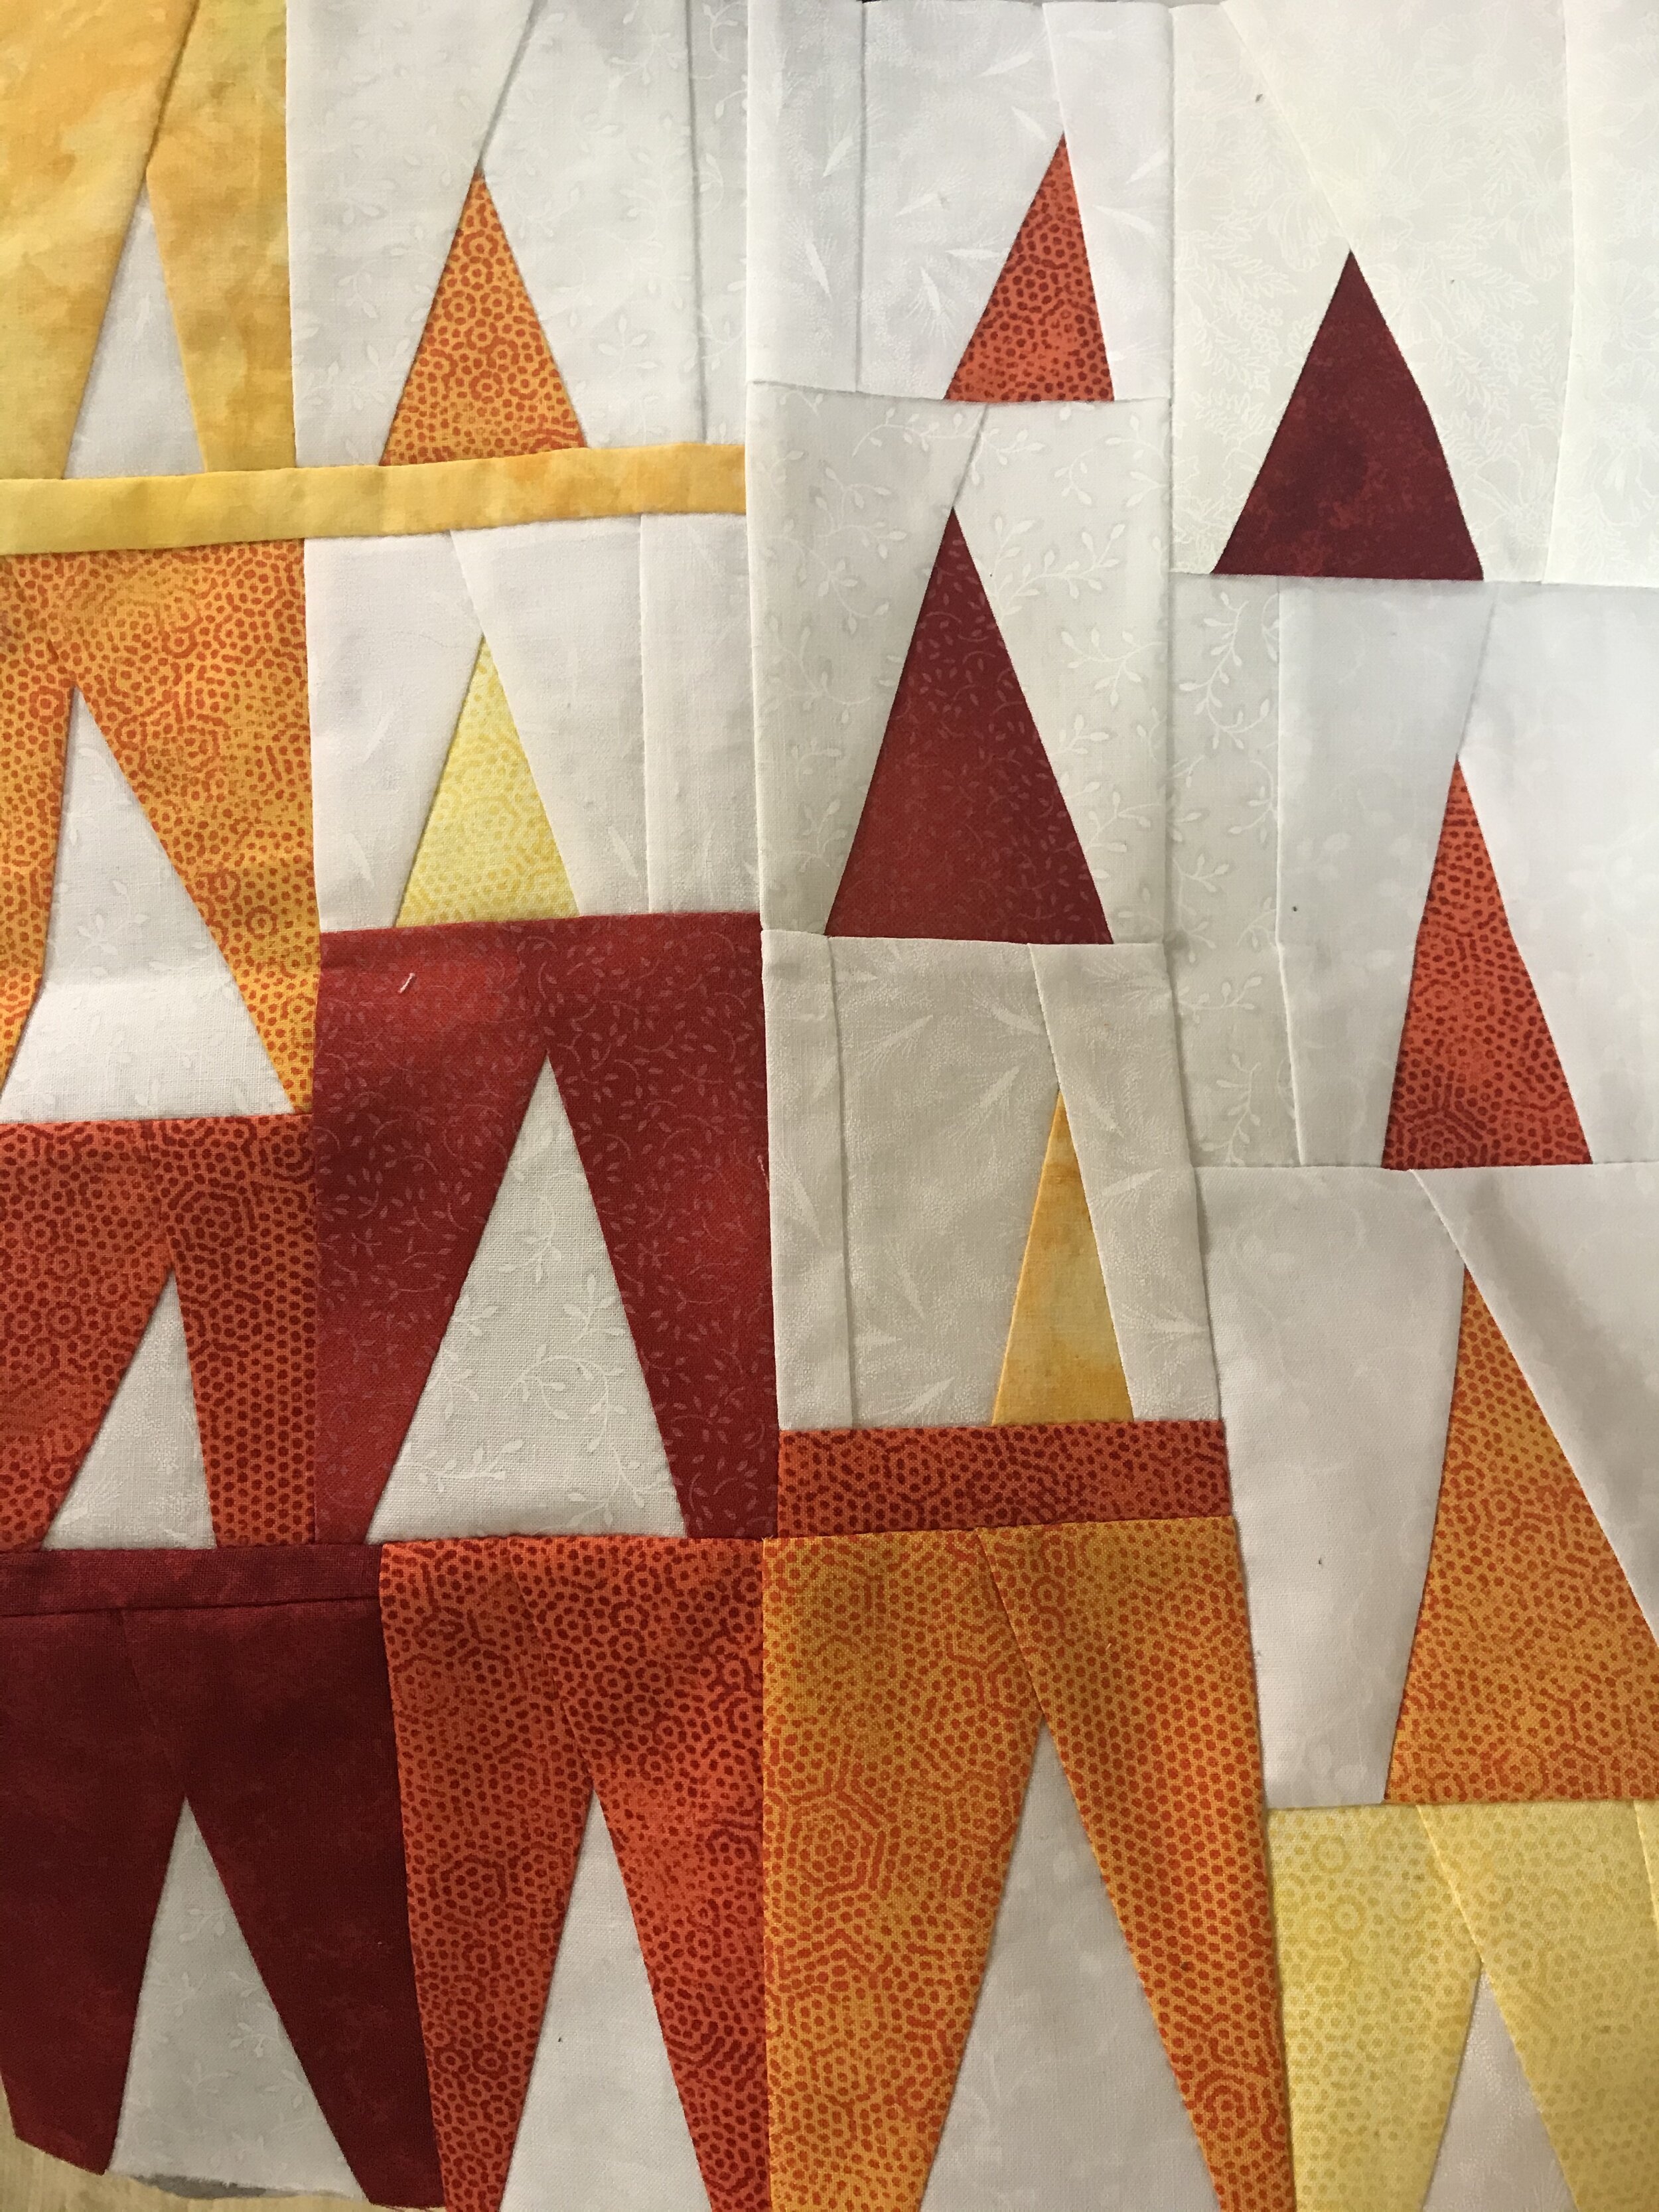
Sarah’s improv triangle quilt.
The theme of these is triangles. The image shows a small quilt top based on the work of Nicholas Ball ‘quilts from the attic’.
Sarah’s hints:
There are lots of ideas online and in books - but they don't all make sense!
Triangles mean bias edges so starch can help
Here are links to other types of triangle blocks:
Right angled triangles could be made using https://www.sarahgoerquilts.com/2019/09/22/planned-improv-tutorial-triangles-on-the-corners/
These floating triangles look great http://www.stitcherydickorydock.com/night-sky-a-floating-triangle-tutorial/
Flying geese are a traditional block but can be made with an improvisational twist using http://www.42quilts.com/2012/01/modern-monday-block-18.html
If you want to make a wonky improvisational star with triangles for the points then http://mqgb.org.uk/tutorboxes/tutorbox13.pdf
If you have started thinking about putting together your blocks Pinterest or Google Image searches can be good for inspiration.
BLOCK 6: Log Cabin

A tutorial for an improv log cabin block ban be found at http://mamalovequilts.com/2012/01/improv-log-cabin-block-tutorial.html. This gives a very different block to the negative space log cabin which is found here http://mqgb.org.uk/tutorboxes/tbox5.html. If you are very clever (or slightly mad) you could try the tutorial at https://citricsugar.blogspot.com/2014/04/curved-improv-log-cabin-tutorial.html for curved log cabin blocks.
Sarah’s hints:
The same basic block can look very different depending on your colour choices
Scrap pieces and off cuts can be used to make amazing blocks and quilts!
You can find other similar blocks here:
http://www.myquiltinfatuation.com/2013/08/calling-all-scrap-lovers-improv-piecing.html
https://quiltingisstillmypassion.blogspot.com/2007/07/mile-minute-blocks-photo-tutorial.html This uses up lots of little squares and rectangluar scrap pieces.
Or you could try a crumb block which uses up any scrap pieces that you have. http://www.15minutesplay.com/2011/01/how-to-15-minute-fabric.html
We had hoped to have a Saturday sewing day for making some of these blocks and working at putting them together but this was not possible because of lockdown.
Finishing your Quilt:
After 6 months into this Modern Improv set of tutorials, Sarah has learnt a lot, like she did not enjoy some techniques, disliked some colours and liked quilts with more negative space.
Looking at how to put the quilts together. In Sarah’s words: ‘I now realise that I prefer to do some planning before I start making blocks, whether in terms of colours, sizes or types of block. I find that having some rough idea of what I'm going to do makes putting the quilt together much easier!’
Here is a sheet with some information on different aspects of putting your quilt together.
BOM Work in Progress


